
How to Crochet an I-Cord
Maybe you have the same problem I do with eyeglasses? You take them off, set them down, and can't find them when you need them. I decided to solve this little dilemma by crocheting an I-cord Eyeglass Holder. And I'm thrilled to share a little tutorial with you in case you might want to make one, too. Wanna see? (Haha. Pun intended.)


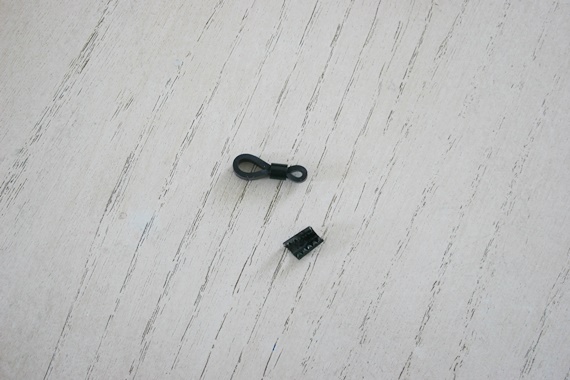
So now you have these pieces from each end. The toothed clamp and the rubber grip part.

Then insert your hook in the next ch and draw up a loop. (3 loops on hook)


Now repeat that with the final free loop.
Insert your hook in the last free loop and ch 1.

Now do that all over again. Remove 2 loops from your hook.
Ch 1, insert into the next loop, ch 1, insert into the next loop, ch 1. Remove 2 loops, and so on.

Keep this up and you will watch the i-cord grow.

If you think about it, you are really just creating 3 chains connected together. Cool, huh?

And this process creates a piece of fabric that naturally curls to the back making a "cord" vs a flat piece of fabric.

By drawing the new color through that first loop...

...and continuing as before, it's easy. And like I said, hiding ends in the curled part on the back of the stitches works brilliantly.
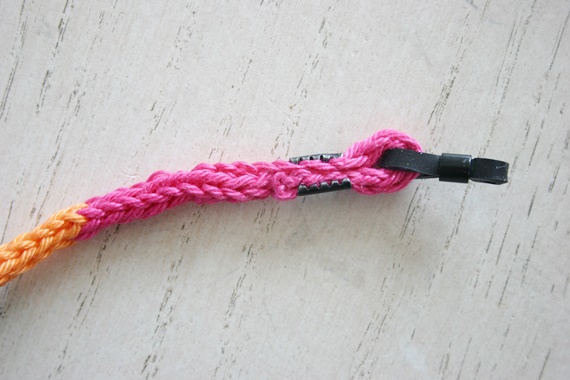
I measured my cord to the ugly brown one before fastening off, inserted my i-cord end through the rubber part of the glasses holder, folded it over on itself added the toothed clamp around the end...
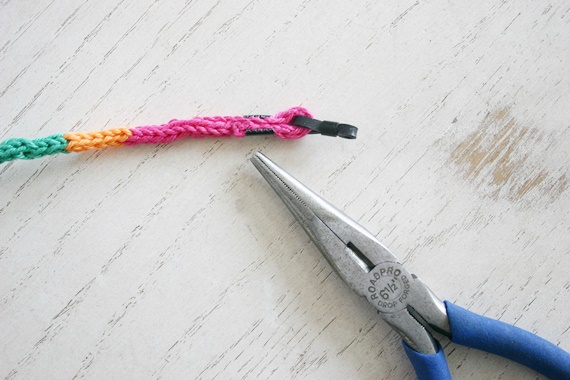
...and gave it a good pinch with some pliers. Repeat on the other end and Ta-Dah!

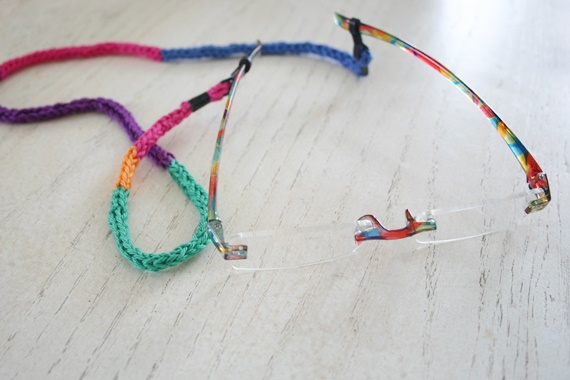
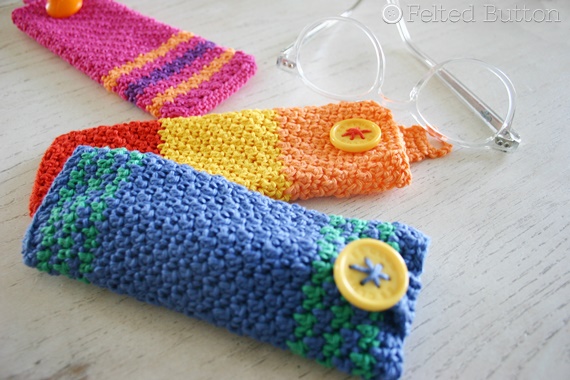
I'm happy with this quick and easy project and hope you enjoy it, too. I would love to hear the other uses you have come up with for I-Cords. If you are interested in the eyeglass cases shown, I have a free pattern for them here.

Be well, dear friends! I've got sooo many things rolling behind the scenes that I'll share with you next week. So you don't miss out, you can keep in the Felted "Button" loop on my Facebook page here or on Instagram (@feltedbutton).
| On the Board | -- To be worthy does not mean to be perfect. Gerrit W. Gong

(This post contains affiliate links. By using them and purchasing, there are no additional charges to you. Only a little small bonus for me.)
Cute, huh? You may not really be interested in an eyeglass holder, though, but read-on. The I-cord technique I'm going to show you ROCKS, and you'll want it in your crochet tool belt! It's such a useful way to make a cord, drawstring, hair-tie, belt, handle for a bag, etc.
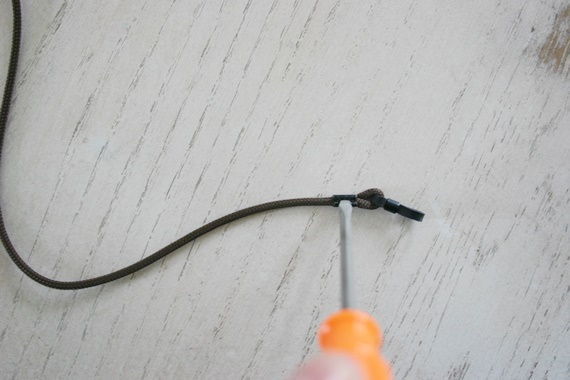
First, I bought one of these inexpensive eyeglass cords at the store and took it apart.

I used a screwdriver to separate the toothed clamp at the end.
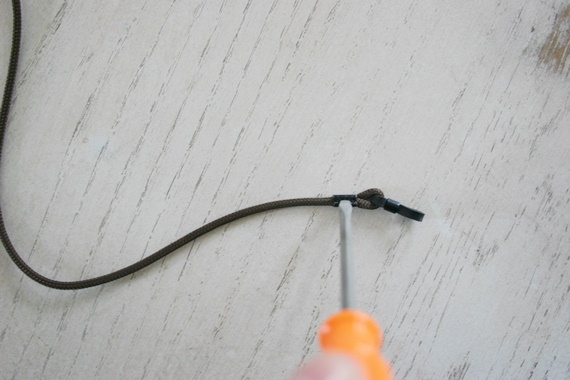
So now you have these pieces from each end. The toothed clamp and the rubber grip part.

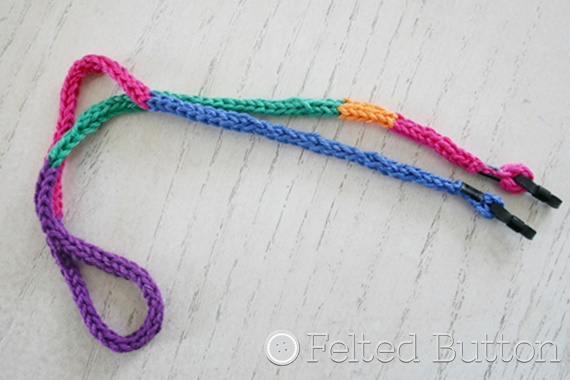
Now on to replacing the ugly brown cord with something colorful and FUN!
For my eyeglass cord, I used a 2.75 mm hook and Scheepjes Catona yarn because it is the perfect weight for this project, durable mercerized cotton and comes in oodles of gorgeous colors. (For some of this tutorial, however, I used a worsted acrylic because it grips itself a little better and was simpler for tutorial purposes when I need to set my hook down to take a picture and pick it back up with free loops dangling.)
What I'm going to show you is called a 3 stitch I-Cord because it is made with 3 chains to start. If you want a wider cord--you can use a heavier weight yarn or more chain stitches to start. Let me show you...
 |
| Shown: Worsted weight yarn with 5mm hook. |
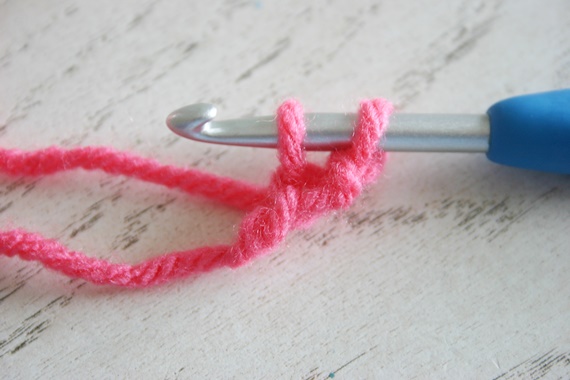
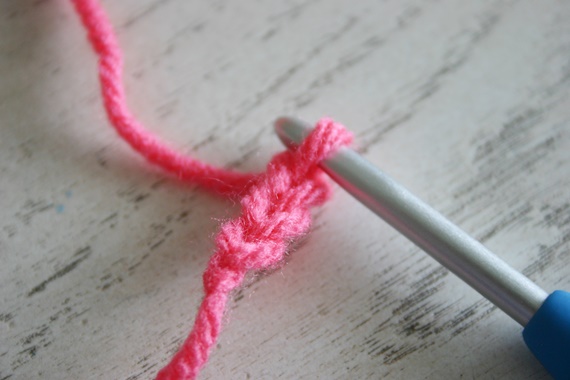
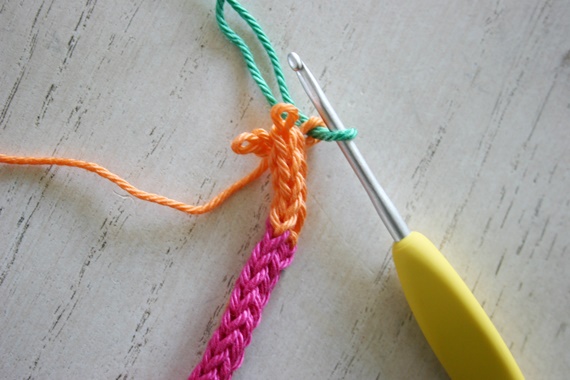
Ch 3...now insert your hook through the 2nd ch from the hook...

...and draw up a loop. (2 loops on hook)
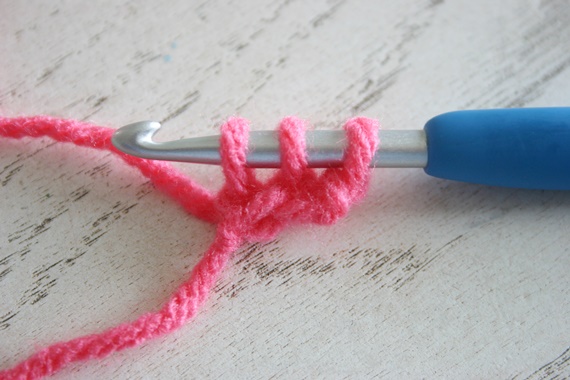
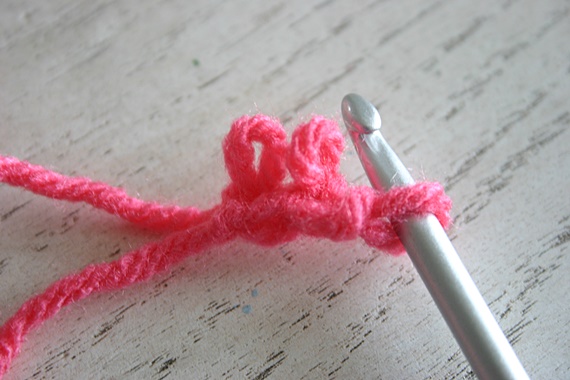
Then insert your hook in the next ch and draw up a loop. (3 loops on hook)

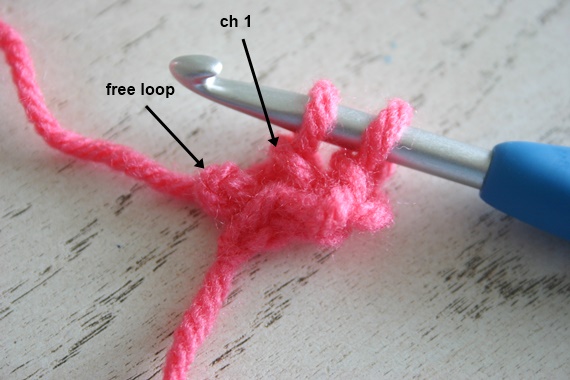
Now remove the loops you just drew up from your hook. Here's the tricky part. While holding the free loops from slipping back out--ch 1. This might take a little practice. If you pull that first ch too tightly, you pull those free loops back out, so hold them firmly. You might even want to try with a bulky yarn and big hook until you get the hang of it.

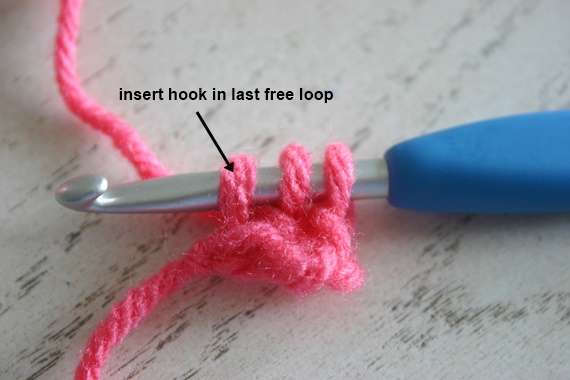
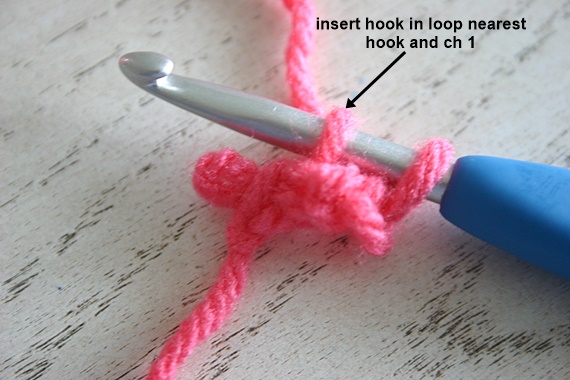
Now insert your hook in the free loop nearest your hook and holding the other free loop from slipping out, ch 1.
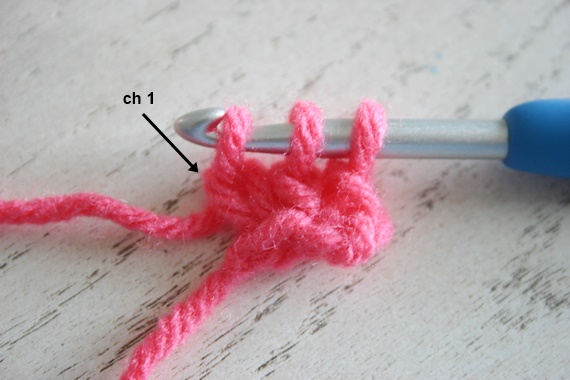
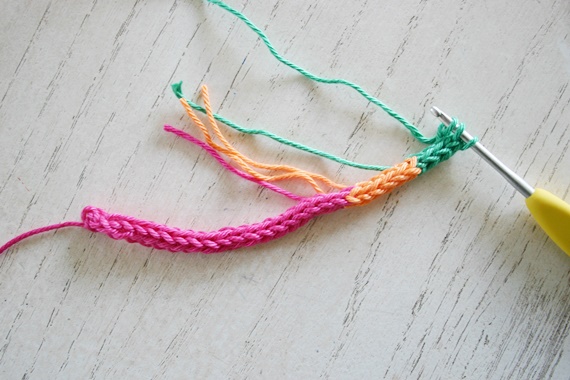
Now repeat that with the final free loop.

Insert your hook in the last free loop and ch 1.
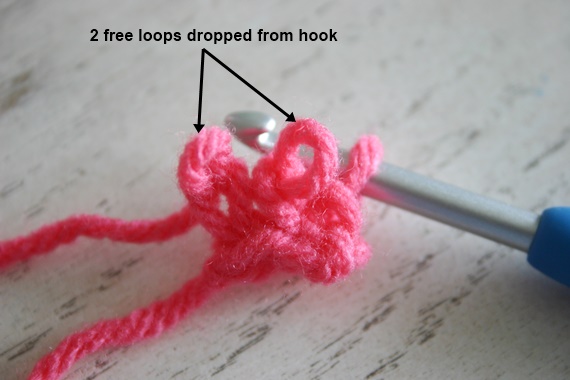
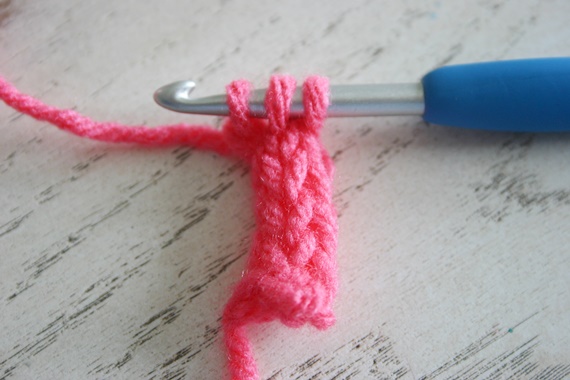
Now do that all over again. Remove 2 loops from your hook.

Ch 1, insert into the next loop, ch 1, insert into the next loop, ch 1. Remove 2 loops, and so on.
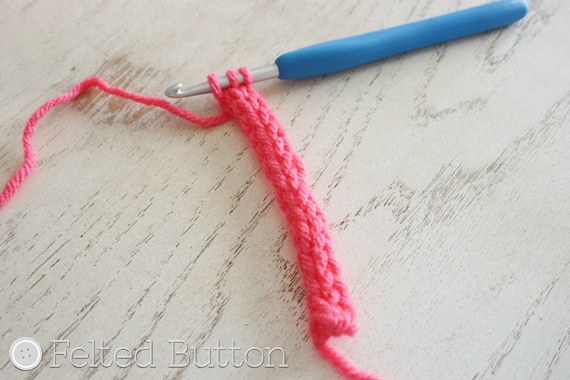
Keep this up and you will watch the i-cord grow.
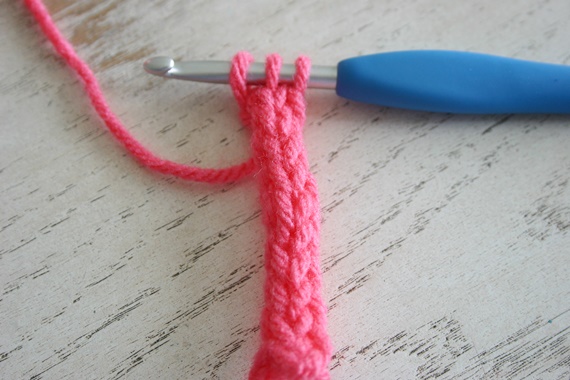
If you think about it, you are really just creating 3 chains connected together. Cool, huh?

And this process creates a piece of fabric that naturally curls to the back making a "cord" vs a flat piece of fabric.

When you get your piece the length you want, just fasten off. The ends weave nicely into the curled part on the back, too.

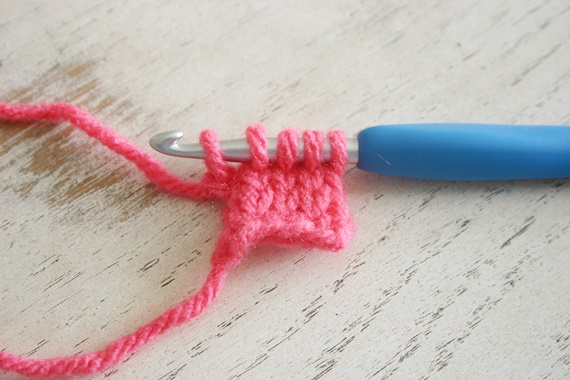
Here is a wee bit showing a 5 stitch i-cord. It is a bit heftier for larger projects and still curls back as it grows. Now let me show you how I changed colors if you want to really mix things up.
By drawing the new color through that first loop...
...and continuing as before, it's easy. And like I said, hiding ends in the curled part on the back of the stitches works brilliantly.

I measured my cord to the ugly brown one before fastening off, inserted my i-cord end through the rubber part of the glasses holder, folded it over on itself added the toothed clamp around the end...

...and gave it a good pinch with some pliers. Repeat on the other end and Ta-Dah!
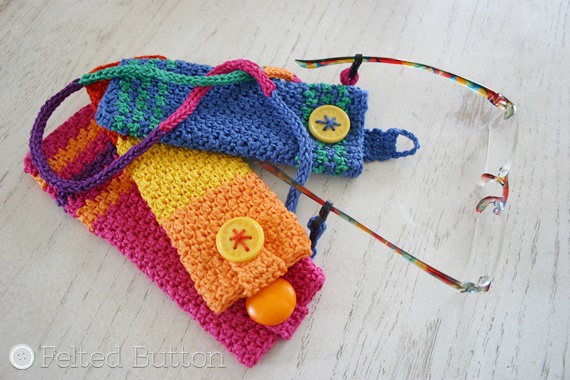
I'm happy with this quick and easy project and hope you enjoy it, too. I would love to hear the other uses you have come up with for I-Cords. If you are interested in the eyeglass cases shown, I have a free pattern for them here.
Be well, dear friends! I've got sooo many things rolling behind the scenes that I'll share with you next week. So you don't miss out, you can keep in the Felted "Button" loop on my Facebook page here or on Instagram (@feltedbutton).
| On the Board | -- To be worthy does not mean to be perfect. Gerrit W. Gong
(This post contains affiliate links. By using them and purchasing, there are no additional charges to you. Only a little small bonus for me.)
Related Posts
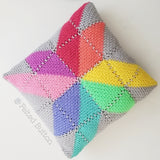
Prism Pillow Crochet Pattern
You know when you are finished with a project and are left with the few bits of leftover yarn--and those leftovers ar...
Read More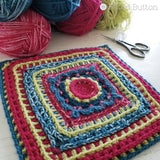
Free Crochet Pattern | Rinske Square
Let me introduce you to my latest free crochet granny square I've named Rinske. I've partnered with the talented Juli...
Read More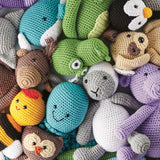
Book Review, Crochet Cute Critters
When I first picked up my hook as an adult to begin crocheting, I did as I typically do when learning new things...I ...
Read More