Free Crochet Pattern | Rinske Square
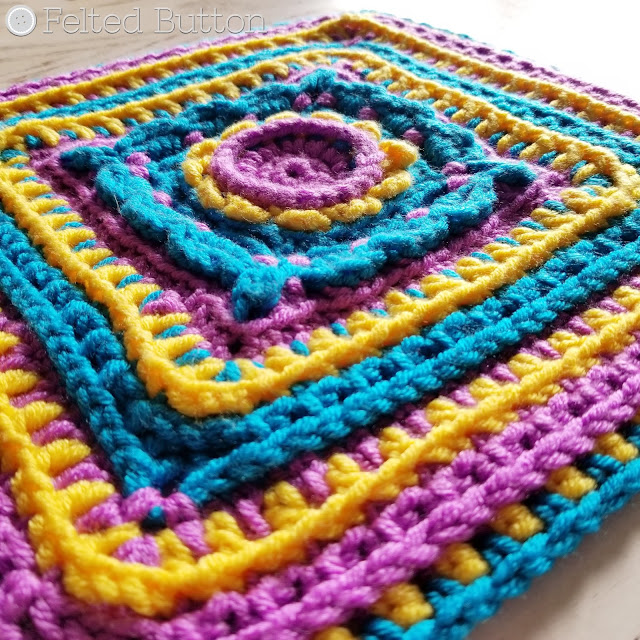
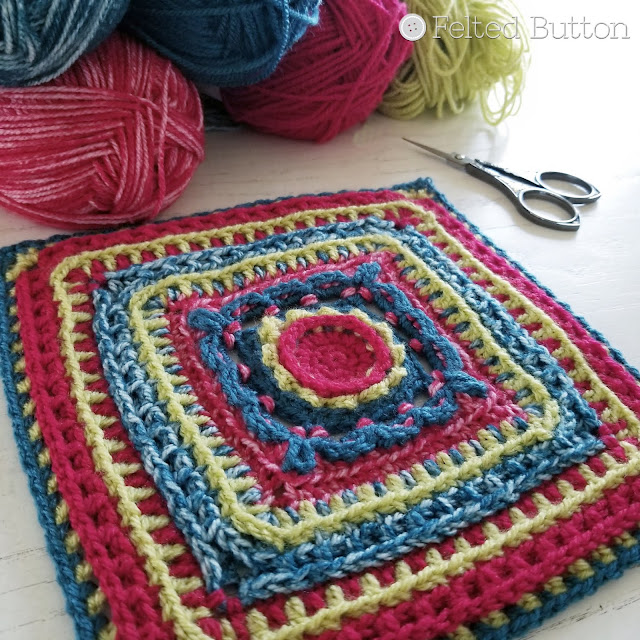
Let me introduce you to my latest free crochet granny square I've named Rinske. I've partnered with the talented Julie Yeager Designs and her 2019 Block a Week series to share with you a 12" (30.5cm) square that's loaded with typical Felted Button color and texture.
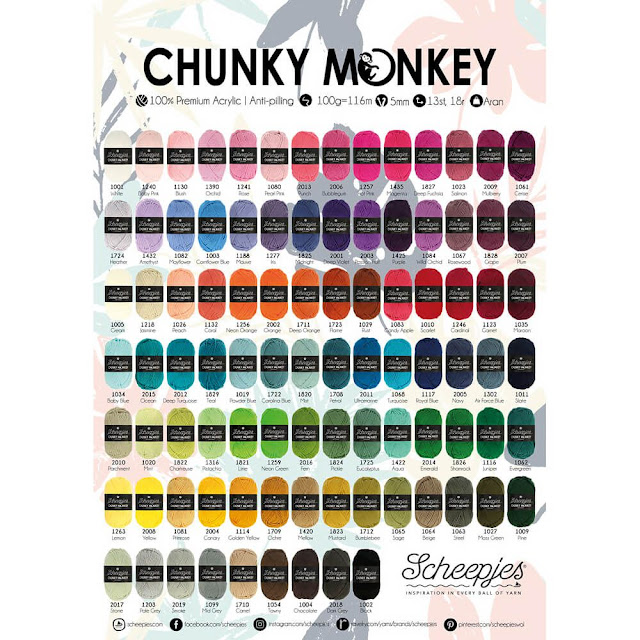
I made my first sample with Scheepjes Chunky Monkey* a super soft-on-the-hook 100% anti-pilling, premium acrylic that comes in a huge range of glorious colors (93 to be precise)!
This shows a foundation chain, but the principle is the same when working any kind of chain--like the ch-7 corners you'll be working in Rnd 7. Notice the two loops on the RS (or top) of the chain that make a V. Now flip the chain over.
I made my first sample with Scheepjes Chunky Monkey* a super soft-on-the-hook 100% anti-pilling, premium acrylic that comes in a huge range of glorious colors (93 to be precise)!
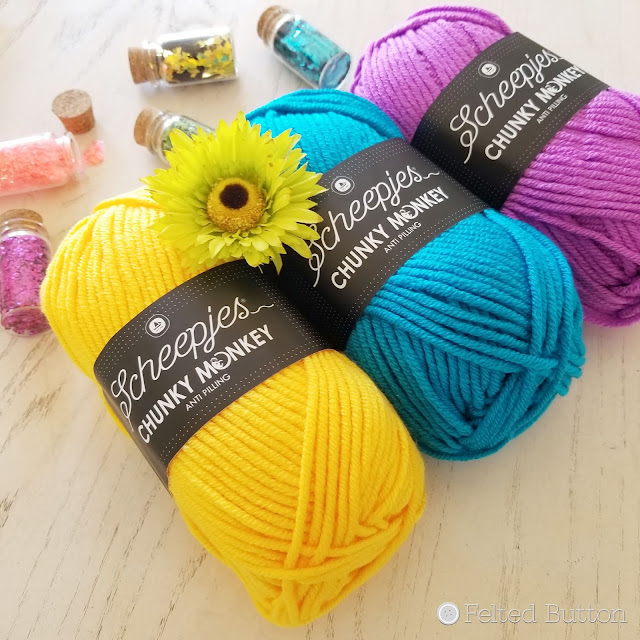
Would you look at those colors? Oh, the things I could do with all that happy color!! I was fortunate to get my hook into these 3 balls of the stuff, and may I just say it's like buttah on my hook.
It's listed as a worsted/aran weight yarn with a suggested hook of 5mm, but it's a hefty medium weight yarn--so I opted for a 5.5mm hook and could have probably moved up to a 6mm comfortably, but that, of course will make your Rinske Square larger.
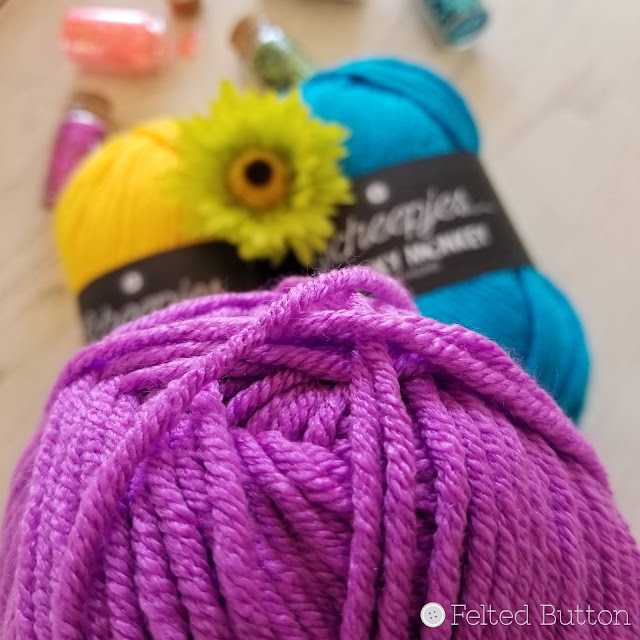
Looking at the yarn closely, you can see what a smooth finish it has--not shiny, but definitely "fuzz free". Did I say, "Buttah"?
So let's get on with the Rinske Square pattern...
MATERIALS:
• Yarn –Scheepjes Chunky Monkey
- 100% Premium Acrylic; 3.5oz/100g; 127yds/116m; aran/worsted
- 3 colors per square: A, B, C of choice
- Hook – 5.5mm (I)
- Sample made with Orchid, Canary, and Deep Turquoise makes a 12" (30.5cm) square
I also made a sample with...
• Yarn—Scheepjes Colour Crafter
- 100% Premium Acrylic; 3.5oz/100g; 328yds/300m; DK/light
- 3 colors per square; A, B, C of choice
- Hook – 4mm (G)
- Sample made with Maastricht (and/or Monroe in Scheepjes Velvet), Delfzijl and Alkmaar (and/or Taylor in Scheepjes Velvet) makes a 8.5" (21.7cm)
Here are a few notes about the pattern:
- Motif is worked in the round with RS facing throughout.
- Ch 1 at the beginning of a round does not count as a stitch.
- All joining at the end of a round is completed with a sl st unless otherwise noted.
- Be mindful of first hl of a hdc or htr after a corner (see Special Stitches). It is somewhat hidden by the stitches of the corner and is easy to miss.
This pattern is written in standard US crochet terms defined here:
|
BLO
|
Back Loop Only
|
Rnd(s)
|
Round(s)
|
|
BPdc
|
Back Post double crochet
|
RS
|
Right Side
|
|
BPhtr
|
Back Post half treble (triple) crochet
|
sc
|
single crochet
|
|
ch
|
chain
|
sk
|
skip
|
|
dc
|
double crochet
|
sl st(s)
|
slip stitch(es)
|
|
hdc
|
half double crochet
|
sp(s)
|
space(s)
|
|
htr
|
half treble (triple) crochet
|
st(s)
|
stitch(es)
|
|
rep
|
repeat
|
yo
|
yarn over
|
Since there are quite a few special stitches and interesting stitch placements I have rated this pattern as Experienced, but hopefully these explanations and some pictures below will help you complete the pattern without too much difficulty. Being ambitious will pay off here...
Special Stitches:
- htr (half treble/triple crochet): yo twice, insert hook in designated st or sp, yo and draw up a loop, yo, draw through two loops, yo, draw through all three loops on hook
- join with sc: with slip knot on hook, insert hook in designated st or sp, yo and draw up a loop, yo and draw through both loops on hook
- join with dc: with slip knot on hook, yo, holding loop with finger, insert hook into designated st or sp, yo and draw up a loop, (yo and draw through two loops) twice
- join with BPdc: with slip knot on hook, yo, holding loop with finger, insert hook from back to front to back around post of designated st, yo and draw up a loop, (yo and draw through two loops on hook) twice
- join with BPhdc: with slip knot on hook, yo, holding loop with finger, insert hook from back to front to back around post of designated st, yo and draw up a loop, yo and draw through all 3 loops on hook
- BPhdc: yo, insert hook from back to front to back around post of designated st, yo and draw up a loop, yo and draw through all 3 loops on hook
- hl of hdc:
This shows a row of hdc, but htr follows the same rules. With RS facing, you can see the two loops of the top of the stitch that make a V. These are the loops you typically work when crocheting unless otherwise instructed.
Now if I tip my hdc row to I'm looking down on the stitches, you can see there is the regular V in black, but the hl of the hdc is identified by the red line. Let me show you the view from the wrong side...
The needle is inserted through the hl (sometimes called the third loop). That's where you insert when intructed to work into the hl of the hdc or htr.
- back bump of chain:
This shows a foundation chain, but the principle is the same when working any kind of chain--like the ch-7 corners you'll be working in Rnd 7. Notice the two loops on the RS (or top) of the chain that make a V. Now flip the chain over.
On the back of the chain you can see a row of bumps that run horizontally along the length of the chain. These are the back bumps and the needle is inserted through this bump. You'll insert your hook into this loop when instructed to work into the back bump of the chain on Rnd 7. This will leave the pretty V undisturbed and make for a neat-looking chain loop at the corners.
-
invisible join:
When asked to invisible join, rather than doing a typical sl st join, you'll follow this method...
When you are ready to invisible join at the end of a round (like here on Rnd 3), complete the last stitch, cut your yarn and pull the tail through the last stitch. Thread your tail on a needle. Then skip the first st of the row. (If your first beginning chain counts as a stitch, skip that one.)
Insert your needle under both loops of the second stitch of the round. (Keep in mind that the invisible join will essentially be duplicating the look of the top of the first stitch by making a little V on top of it to join the round.)
Now insert your needle in the back loop of the last stitch you worked of the round, as shown. This will give you look of the duplicated V on top of your first st so you can't even tell where the join took place.
Neato bandito, huh? Now here's how make your Rinske Square.
Rnd 1 (RS): With A, make magic ring (or ch 3, sl st into first ch to form ring), ch 1, 6 sc in ring, pull tail to close ring, join to first sc (6 sc)
Rnd 2: Ch 1, 2 sc in each st around, join to first sc (12 sc)
Rnd 3: Ch 3 (counts as dc), dc in same st as joining, 2 dc in each st around, invisible join (24 dc)
Rnd 4: With B, join with BPhdc (see Special Stitches) to post of any dc, ch 3, sk next dc, *BPhdc around next dc, ch 3, sk next dc; rep from * around, join to first BPhdc, fasten off (12 BPhdc, 12 ch-3 sps)
Rnd 5: With C and working behind ch-3 sps of previous rnd, join with sc (see Special Stitches) in BLO of any BPhdc, BPdc around unworked post of next dc of Rnd 3, *sc in BLO of next BPhdc, BPdc around unworked post of next dc of Rnd 3; rep from * around, join to first sc (12 sc, 12 BPdc)
Rnd 6: Ch 1, (2 sc in sc, sc in BPdc) rep around, join to first sc (36 sc)
Rnd 7: Ch 1, (sc, ch 7, sc) in same st as joining, *(ch 3, sk 2 sts, sc in next) twice, ch 3, sk 2 sts, (sc, ch 7, sc) in next st); rep from * 3 more times omitting final (sc, ch 7, sc) corner, join to first sc (2 ch-7 loops and 3 ch-3 loops and 4 sc each side)
Rnd 8: *Ch 2, working behind ch-7 loop, sl st in next sc, (3 hdc in next ch-3 loop, sl st in next sc) 3 times; rep from * 3 more times omitting last sl st, join to first sl st, fasten off (4 ch-2 sps, 9 hdc each side, 4 sl sts each side)
Rnd 9: With A, join with *sc in back bump (see Special Stitches) of center st of ch-7 loop, 2 dc in ch-2 loop behind ch-7 loop, BPdc around sc of Rnd 7 below, (BPhdc around next 3 hdc, BPdc around sc of Rnd 7 below) 3 times, 2 dc in ch-2 loop behind ch-7 loop; rep from * 3 more times, join to first sc (4 dc, 4 BPdc, 9 BPhdc each side between sc at corners)
Rnd 10: Ch 1, *(sc, ch 2, sc) in BLO of sc, sc in BLO of each st to sc; rep from * 3 more times, join to first sc, fasten off (19 sc between corner ch-sps)
Rnd 11: With B, join with dc in any ch-2 sp, ch 3, dc in same sp, ch 1, *(sk 1 st, dc in next st, ch 1) rep to corner, (dc, ch 3, dc, ch 1) in ch-2 sp; rep from * 3 more times omitting final corner, join to first dc, fasten off (11 dc and 10 ch-1 sps each side between corner ch-sps)
Rnd 12: With C, join with sc in BLO of first dc to left of any corner, *(working behind previous rnd, htr in next unworked st two rnds below, sc in BLO of next dc) rep to corner, working behind previous rnd, 3 htr in ch-2 corners two rnds below, sc in BLO of dc; rep from * 3 more times omitting final sc, join to first sc (10 htr and 11 sc between 3 htr groups)
Rnd 13: Ch 1, hdc in each sc and hl of each htr around (see Special Stitches), placing (hdc, ch 2, hdc) in hl of center htr of each corner, join to first hdc, invisible join (25 hdc between corner ch-sps)
Rnd 14: With A, join with sc in hl of first hdc to left of any corner, sc in hl of each hdc around placing (sc, ch 2, sc) in each ch-2 corner sp, join to first sc, drop yarn, do NOT fasten off (27 sc each side)
Rnd 15: With B, join with dc in any ch-2 sp, ch 3, dc in same sp—corner made, ch 1, *(sk 1 st, dc in next st, ch 1) rep to corner, (dc, ch 3, dc, ch 1) in ch-2 sp; rep from * 3 more times omitting final corner, join to first dc, fasten off (15 dc and 14 ch-1 sps between corner ch-sps)
Rnd 16: Pick up A, ch 3 (counts as htr), *(sc in BLO of dc, working behind previous rnd, htr in unworked st two rnds below) rep to corner, sc in BLO of next dc, working behind previous rnd, 3 htr in ch-2 sp two rnds below; rep from * 3 more times, sc in BLO of dc, join to third ch of ch-3 (14 htr and 15 sc between corner htr groups)
Rnd 17: Rep Rnd 13 (33 hdc each side) Note: When working into the ch-3 of previous Rnd, working into a single loop of the chain will somewhat replicate the hl of the htr.
Rnd 18: With B, join with sc in any ch-2 corner sp, (sc, ch 2, 2 sc) in same sp—corner made, *working in hl of hdc around, (ch 1, sk 1 hdc, sc in hl of next hdc) rep to corner, ch 1, (2 sc, ch 2, 2 sc) in ch-2 corner sp; rep from * 3 more times omitting final corner, join to first sc, fasten off (20 sc and 17 ch-1 sps between corner ch-sps)
Rnd 19: With C, join with sc in st just before any corner ch-2 sp, *(sc, ch 2, sc) in ch-2 sp, sc in next st, (ch 1, sk 1 sc, sc in next ch-1 sp) rep across, ch 1, sk 1 sc; rep from * 3 more times omitting final sc, invisible join (21 sc, 18 ch-1 sps)
Weave in ends and block as desired.
If you are interested in getting your hooks into the Scheepjes yarns I used here you can find it in the following places, all with worldwide shipping:
Wool Warehouse* (UK)
Deramores* (UK)
Knotty House* (CA)
Stitched Naturally (US)
PDF PATTERN:
And if you would like a nice and tidy, ad-free, print-friendly PDF version of the Rinske Square pattern you can purchase it in my Etsy shop for a small fee, which also supports me in my efforts to provide free patterns. This pattern also contains a more complete Picture Section which is not intended to replace the written pattern but does give you a bit more assistance.
I hope you enjoy the pattern. I'm always curious to know what colors people choose for their projects, so please do share in my Facebook group here. (I'm really interested to see this one done in a single color, too, as a solid color really tends to feature the texture spectacularly.)
Also, you've got a few days to complete your square for Granny Square Day which is on August 15. You can share your granny square pics on Instagram to get involved. Follow this link to the Simply Crochet Magazine site, the sponsors of the Granny Square Day celebration, to get more information. And please remember to tag me @feltedbutton so I can see your creations when you post them!
| On the Board| -- A lot of what weighs you down isn't yours to carry.

