
Window to the Whirl Part 2
Last week I shared the free crochet pattern for Part 1 of my Window to the Whirl Blanket which included the panel with the nifty little "windows" created by the intermeshing crochet technique. Today I'm sharing Part 2 of the blanket. This section, made with its own coordinating Scheepjes Whirl, is really rhythmic and relaxing but perfectly highlights the gradient fade of the yarn. Let's get on with the details of how you can crochet your own.
 using Scheepjes Whirl. Designed by Susan Carlson of Felted Button.")
 using Scheepjes Whirl. Designed by Susan Carlson of Felted Button.")


 using Scheepjes Whirl. Designed by Susan Carlson of Felted Button.")
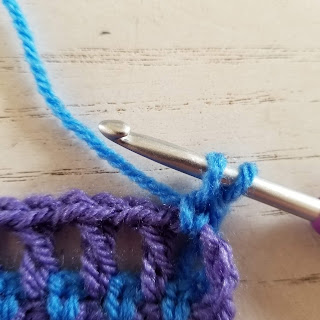
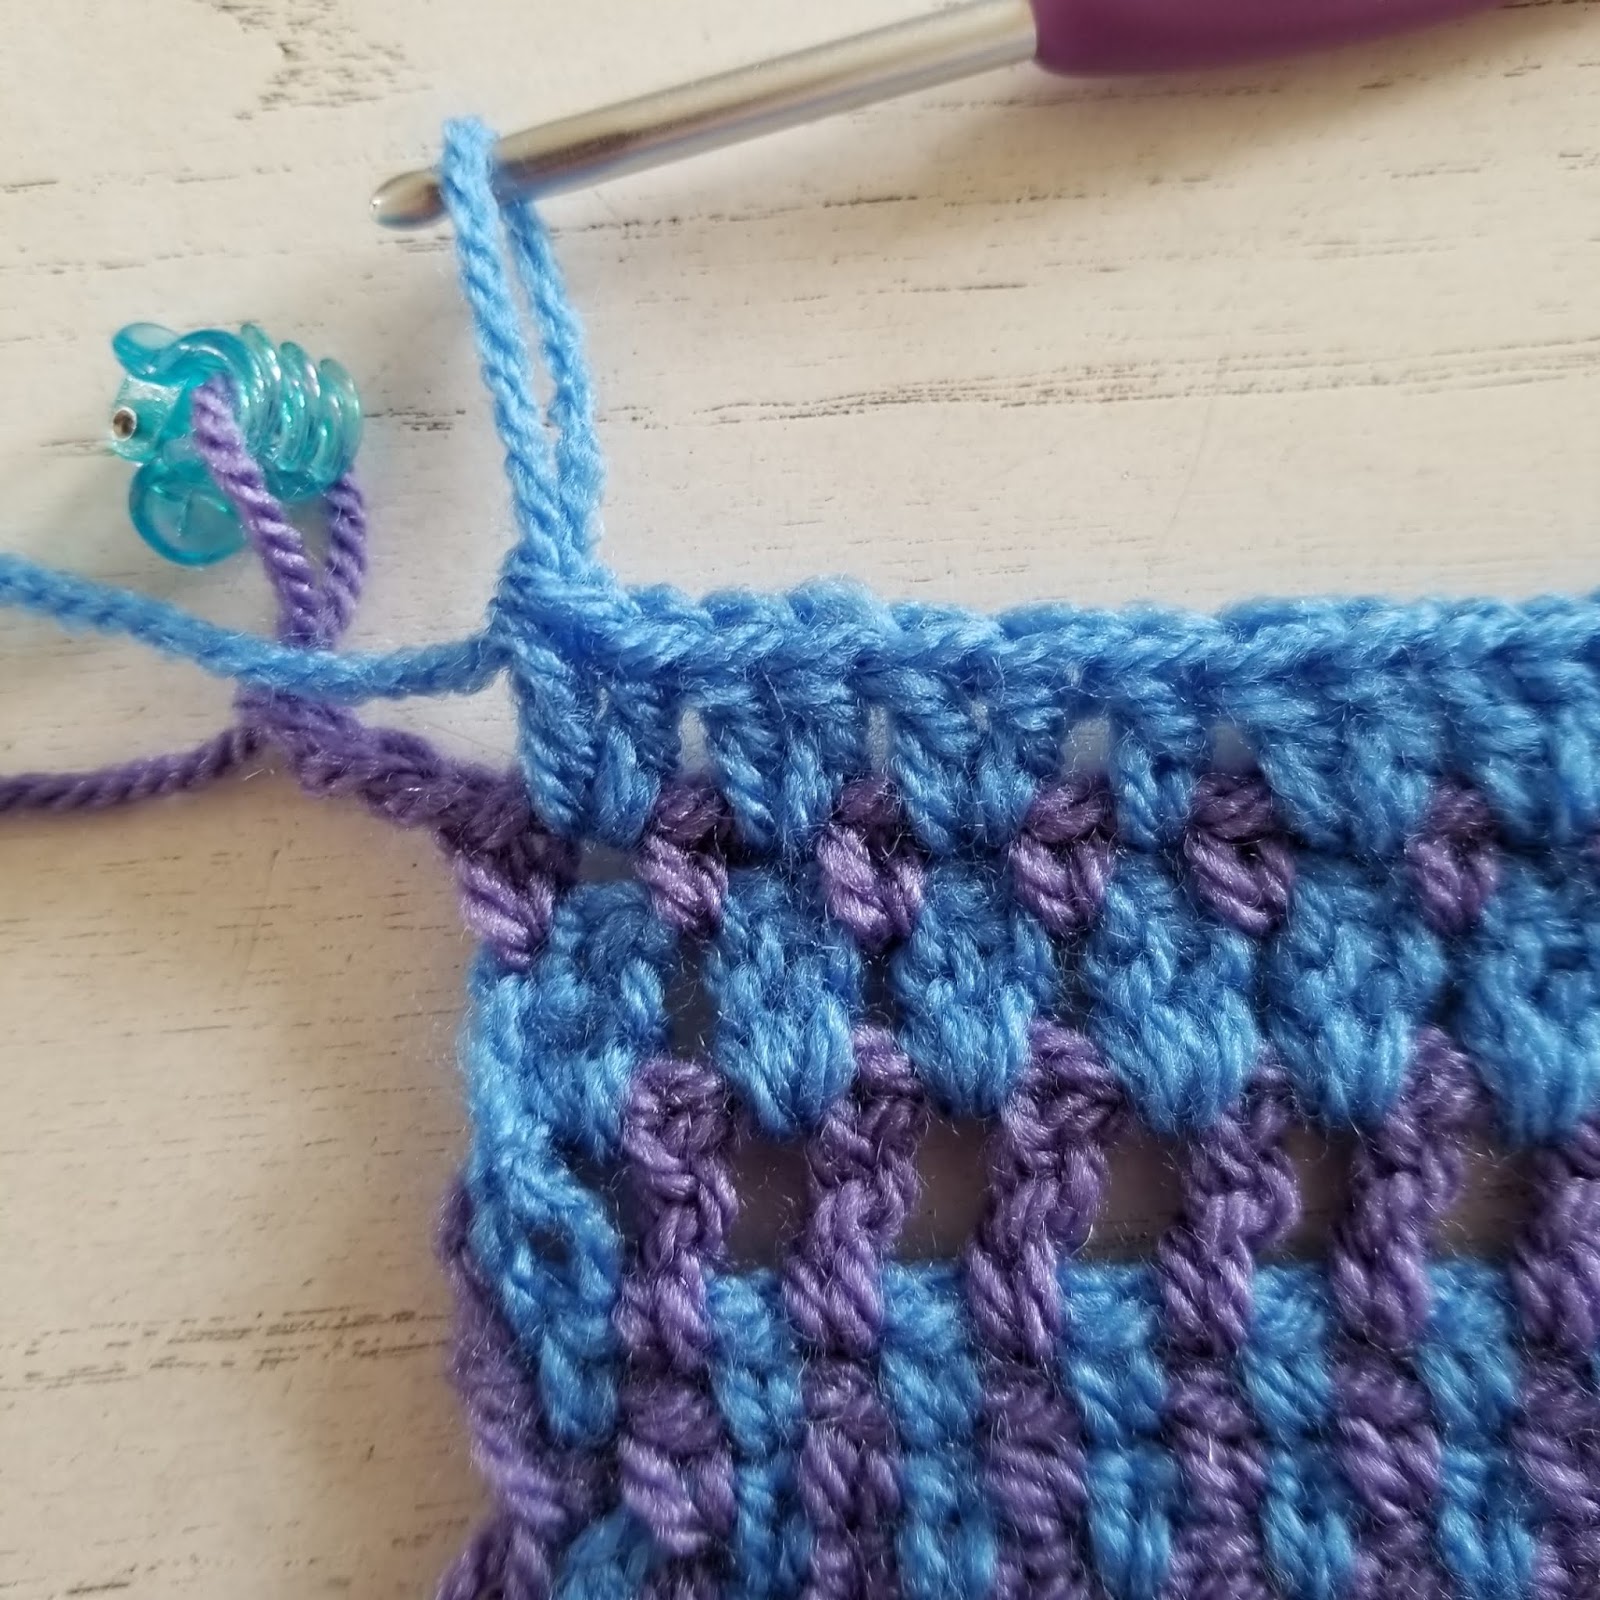
When you've completed your intermeshing panel, grab your second whirl. The one below is Murderous Mint (C) from the Scheepjes Whirl Ombre Collection and your Whirlette in Liquorice (A), and poise that hook.
 using Scheepjes Whirl. Designed by Susan Carlson of Felted Button.")
Speaking of hooks, for this next section, I used a 3.5mm hook, as I did for Section 1, but if you tend to work your chains a bit tight, you might want to move up to a 4mm for Rows 1-3 and its repeats--or work your chains loosely.
Here are the stitch abbreviations in US terms for the pattern:
|
ch
|
chain
|
sc
|
single crochet
|
|
Cl
|
2-double crochet Cluster
|
sk
|
skip
|
|
dc
|
double crochet
|
sl st
|
slip stitch
|
|
dcb
|
double crochet in back
|
sp(s)
|
space(s)
|
|
dcf
|
double crochet in front
|
st(s)
|
stitch(es)
|
|
rep(s)
|
repeat(s)
|
WS
|
Wrong Side
|
|
Rnd(s)
|
Round(s)
|
yo
|
yarn over
|
|
RS
|
Right Side
|
You won't be using the dcb and dcf on this second panel, but you'll be using the Cl and a couple of other special stitches:
• join with sc—with slip knot on hook, insert hook in designated st, yo and draw through, yo and draw through both loops on hook
• stacked sc (counts as dc)— sc in designated st or sp, insert hook in left leg of sc just worked, yo and draw up a loop, yo and draw through both loops on hook
• Cl (2-double crochet Cluster)—(yo, insert hook in designated ch-sp, yo and draw up a loop, yo, draw through two loops) twice, yo, draw through all 3 loops on hook
• half-closed dc—bold portion of Cl (above) worked only once
Side Panel -- Section 2:
Tip: Use loose chains between sc or use a 4mm hook. Worked lengthwise along the right side of the Intermesh Panel alternating A with C. Always drop your non-working loop to the BACK before beginning with a new color. Ch 2 counts as sc, ch 1.
Row 1a (RS): With RS facing and using A, join with sc at bottom of intermesh panel, ch 1, sc in first window, ch 1, (sc in next window, ch 1) rep across, sc in corner, ch 2, drop A, do NOT turn (77 sc and 76 ch-1 sps)


Row 1b (RS): With C, join with sc in first ch-1 sp of last row, ch 1, (sc in next ch-1 sp, ch 1) rep across, ch 2, drop C, turn (76 sc and 75 ch-1 sps)

 Row 2b (WS): With C, (sc in next ch-1 sp, ch 1) rep across, ch 2, drop C, turn


Notice this is the Right Side because you can see the "blank windows" from the foundation mesh. That's the corner you'll join into.

Complete (sc, ch 1) across to the corner, then drop A, place a marker and grab C.
Row 1b (RS): With C, join with sc in first ch-1 sp of last row, ch 1, (sc in next ch-1 sp, ch 1) rep across, ch 2, drop C, turn (76 sc and 75 ch-1 sps)

Join with C in the first ch-1 sp of the last row. (Sc, ch 1) in each ch-1 sp across. Drop C and pick up A. Then turn your work.
Row 2a (WS): With A, (sc in next ch-1 sp, ch 1) rep across, sc in first sc of A 2 rows below, ch 2, drop A, do NOT turn

You're working in the ch-1 sps across with A. When you get to the end, work sc into that sc of A two rows below. Don't turn, but drop A and pick up C.
Row 3a: With A, (sc in next ch-1 sp, ch 1) rep across, sc in ch-2 sp, ch 1, sc in ch-2 sp of A 2 rows below, ch 2, drop A, do NOT turn
Row 3b: With C, (sc in next ch-1 sp, ch 1) rep across, ch 2, drop C, turn
Row 3b: With C, (sc in next ch-1 sp, ch 1) rep across, ch 2, drop C, turn


You work into that ch-2 sp (which counts as a sc, ch 1), then sc into the sc of A two rows below again.
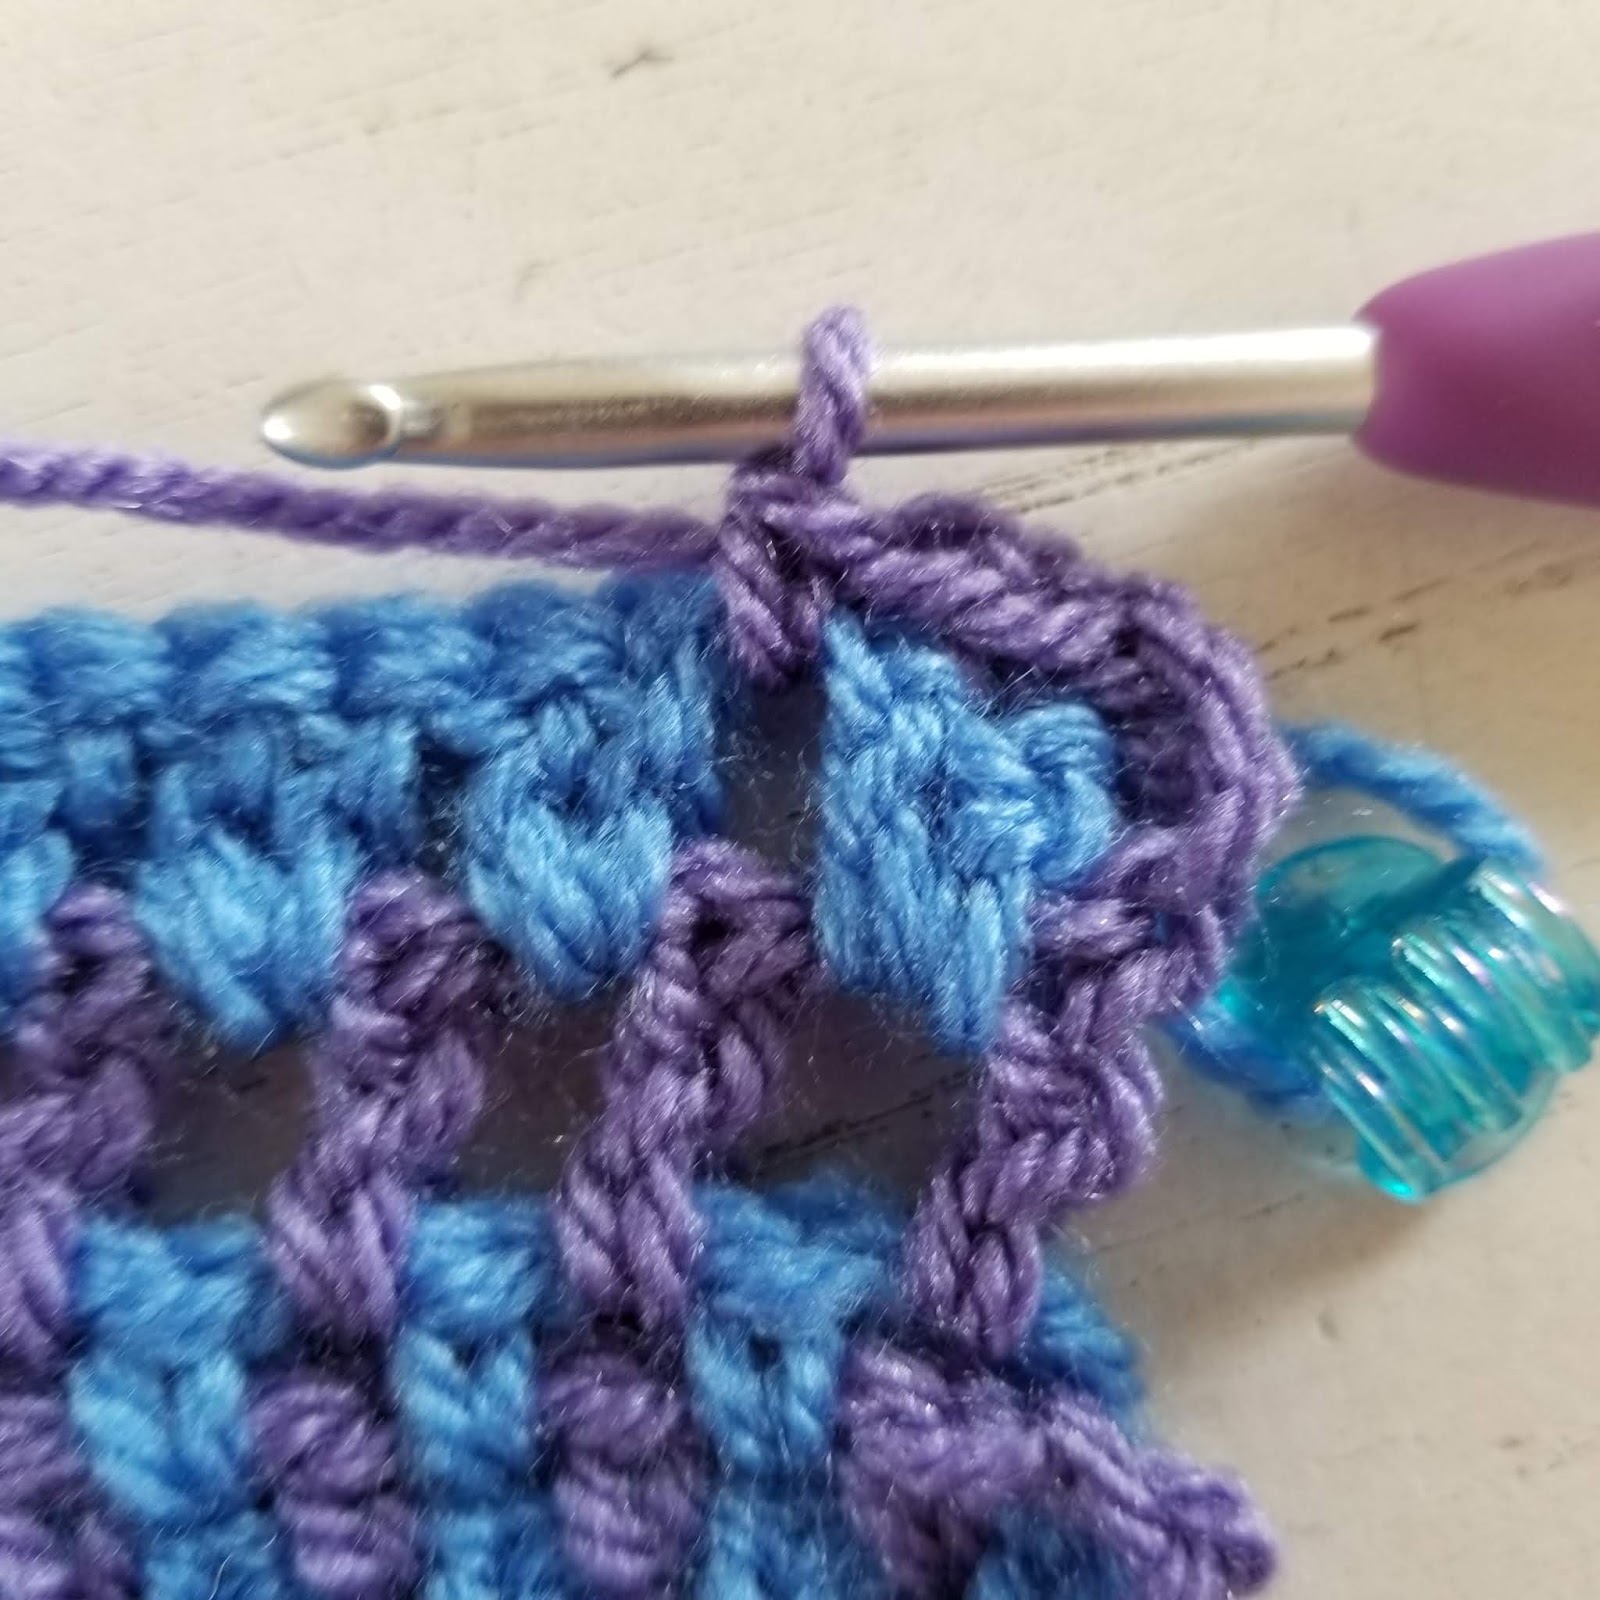
Rep Row 3 until section is 10”/25.5cm high or 60 total rows
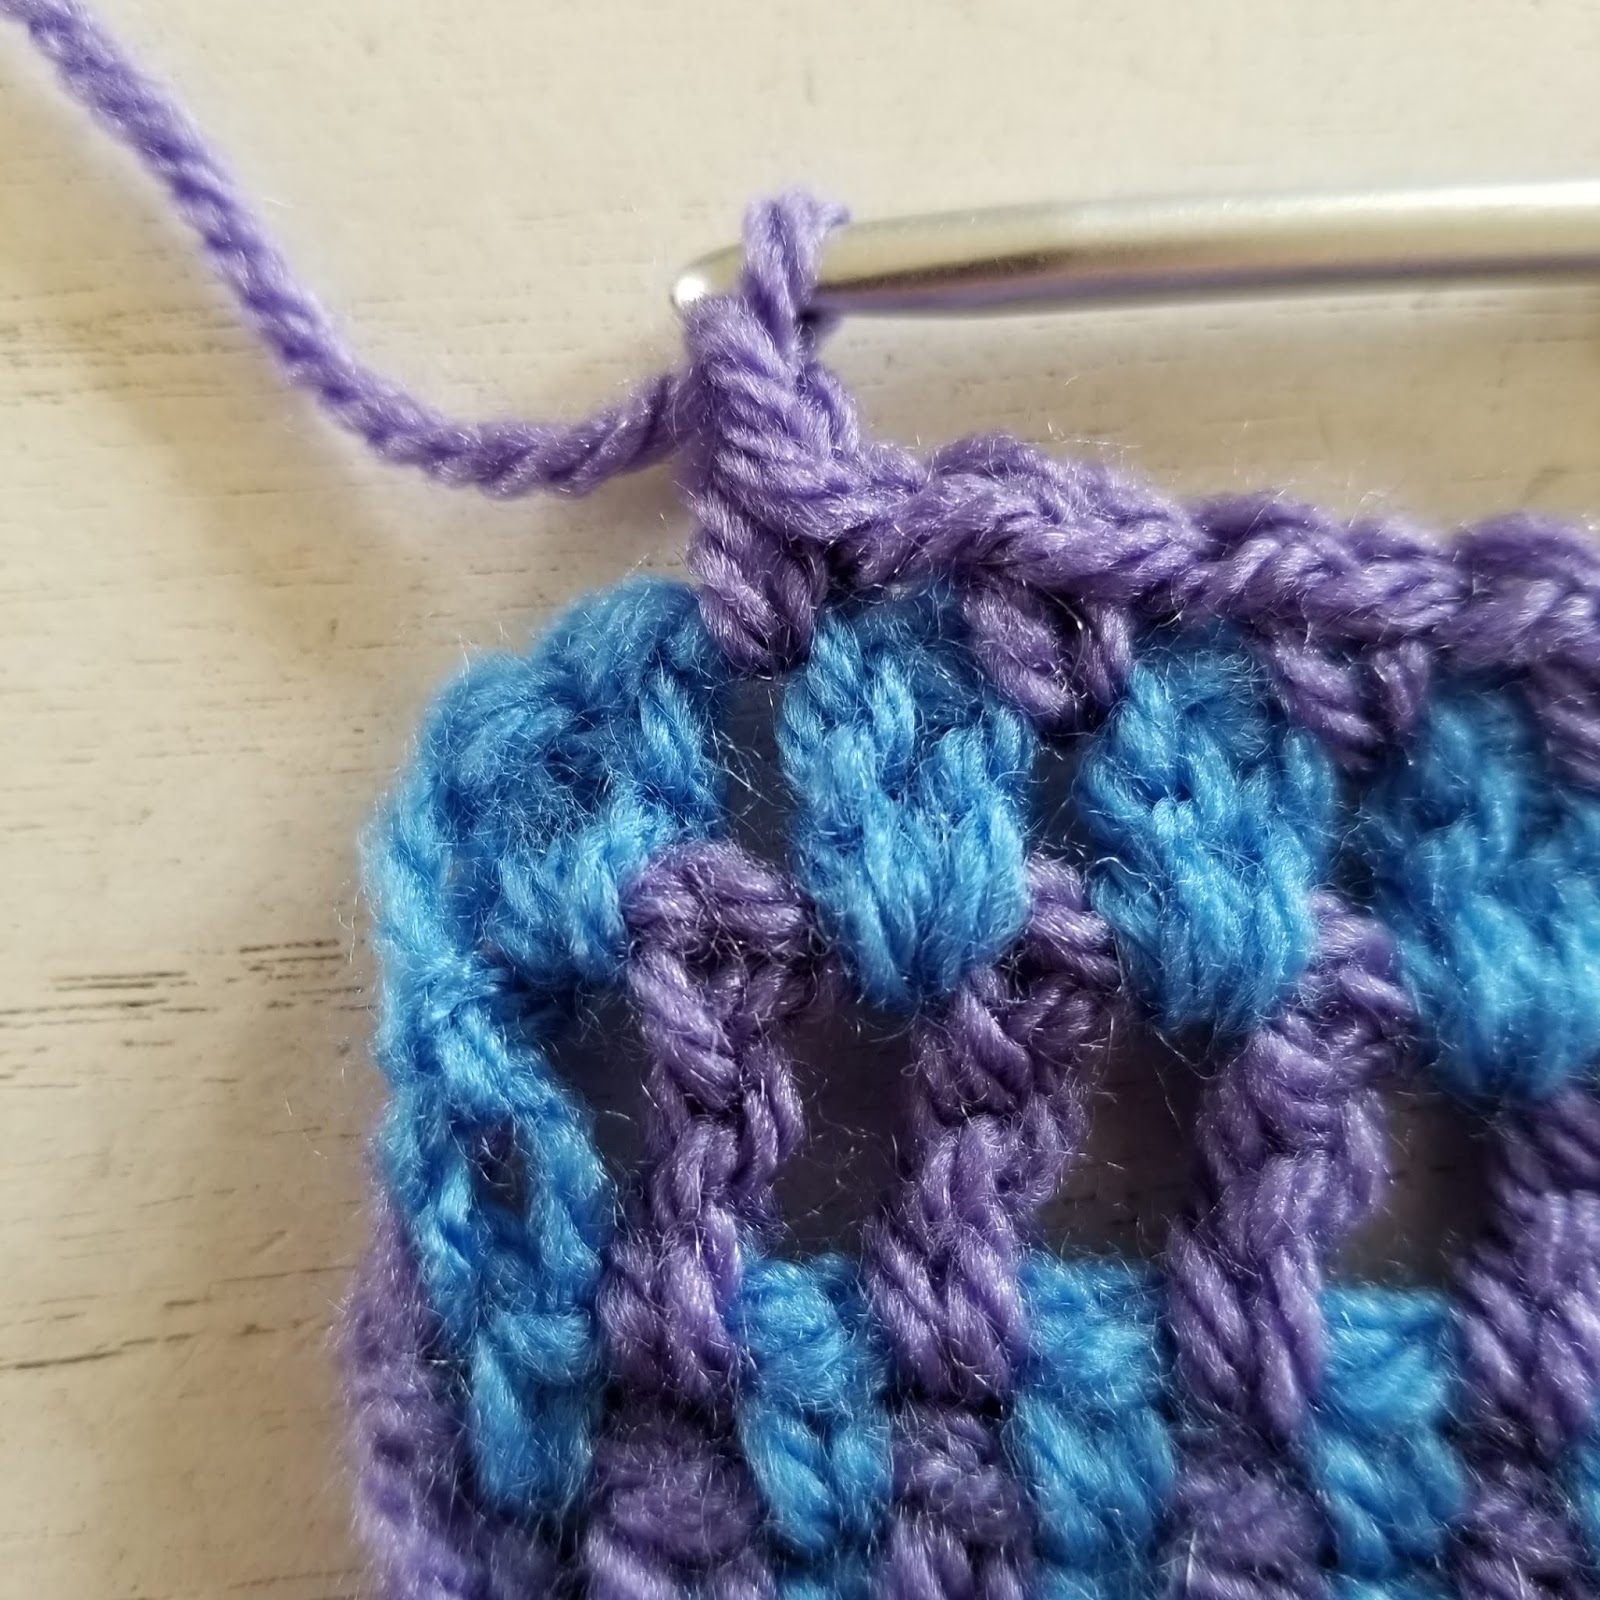
Row 4a: With A, ch 2 more (ch-4 counts as dc, ch 1), (dc in next ch-1 sp, ch 1) rep across, dc in ch-2 sp, ch 2, drop A, do NOT turn


Row 4b: With C, stacked sc (counts as dc) in ch-4 sp, dc in same sp, (2 dc in next ch-1 sp) rep across to last ch-1 sp, dc in last ch-1 sp, dc in last dc of 4a, ch 1, drop C, turn

A stacked sc is essentially two sc stacked on top of each other. The first sc of the stacked sc is worked in the ch-sp, as shown above. The red line marks the left leg of that first sc. It is under this loop that you will work your second sc to make a stacked sc.
 This shows a complete stacked sc. It's got a couple of advantages in that it has an actual top to the stitch and also has the thickness more closely resembling a dc. I like it. Just think, you can continue to work into the left leg of each sc to make it as tall as you want! Now work a second dc in the same sp, next to your stacked sc. (That counts as 2 dc.)


A stacked sc is essentially two sc stacked on top of each other. The first sc of the stacked sc is worked in the ch-sp, as shown above. The red line marks the left leg of that first sc. It is under this loop that you will work your second sc to make a stacked sc.

This shows a loop drawn up through that left leg of the previous sc. Now yarn over and draw through both loops on the hook to complete the stacked sc.


Continue working 2 dc in each ch-1 sp across. Ch 1 and drop C. Don't turn but pick up A.
Row 5a: With A, sc in first st, ch 1, sc between next 2 sts, ch 1, *sk 2 dc, sc between last skipped dc and next dc, ch 1; rep from * across, sc in stacked sc of 4b, ch 2, drop A, do NOT turn


Sc in the first dc (your stacked sc), then ch 1.
Now sc between the 2-dc groups with a ch-1 between each to the end.
Sc in the last dc of the row, then ch 2, and drop A. Don't turn, but pick up C.
Row 5b: With C, stacked sc in first ch-1 sp, dc in same sp, (2 dc in next ch-1 sp) rep across, ch 1, drop C, turn

This is just like the previous row with C. Work 2 dc in each ch-1 sp and across you go.
Rep Row 5eleven more times (13 color C rows)
Rep Rows 4-5 once
Rep Row 5 seven times (9 color C rows)
Rep Rows 4-5 once
Rep Row 5 three times (5 color C rows)
Rep Rows 4-5 once
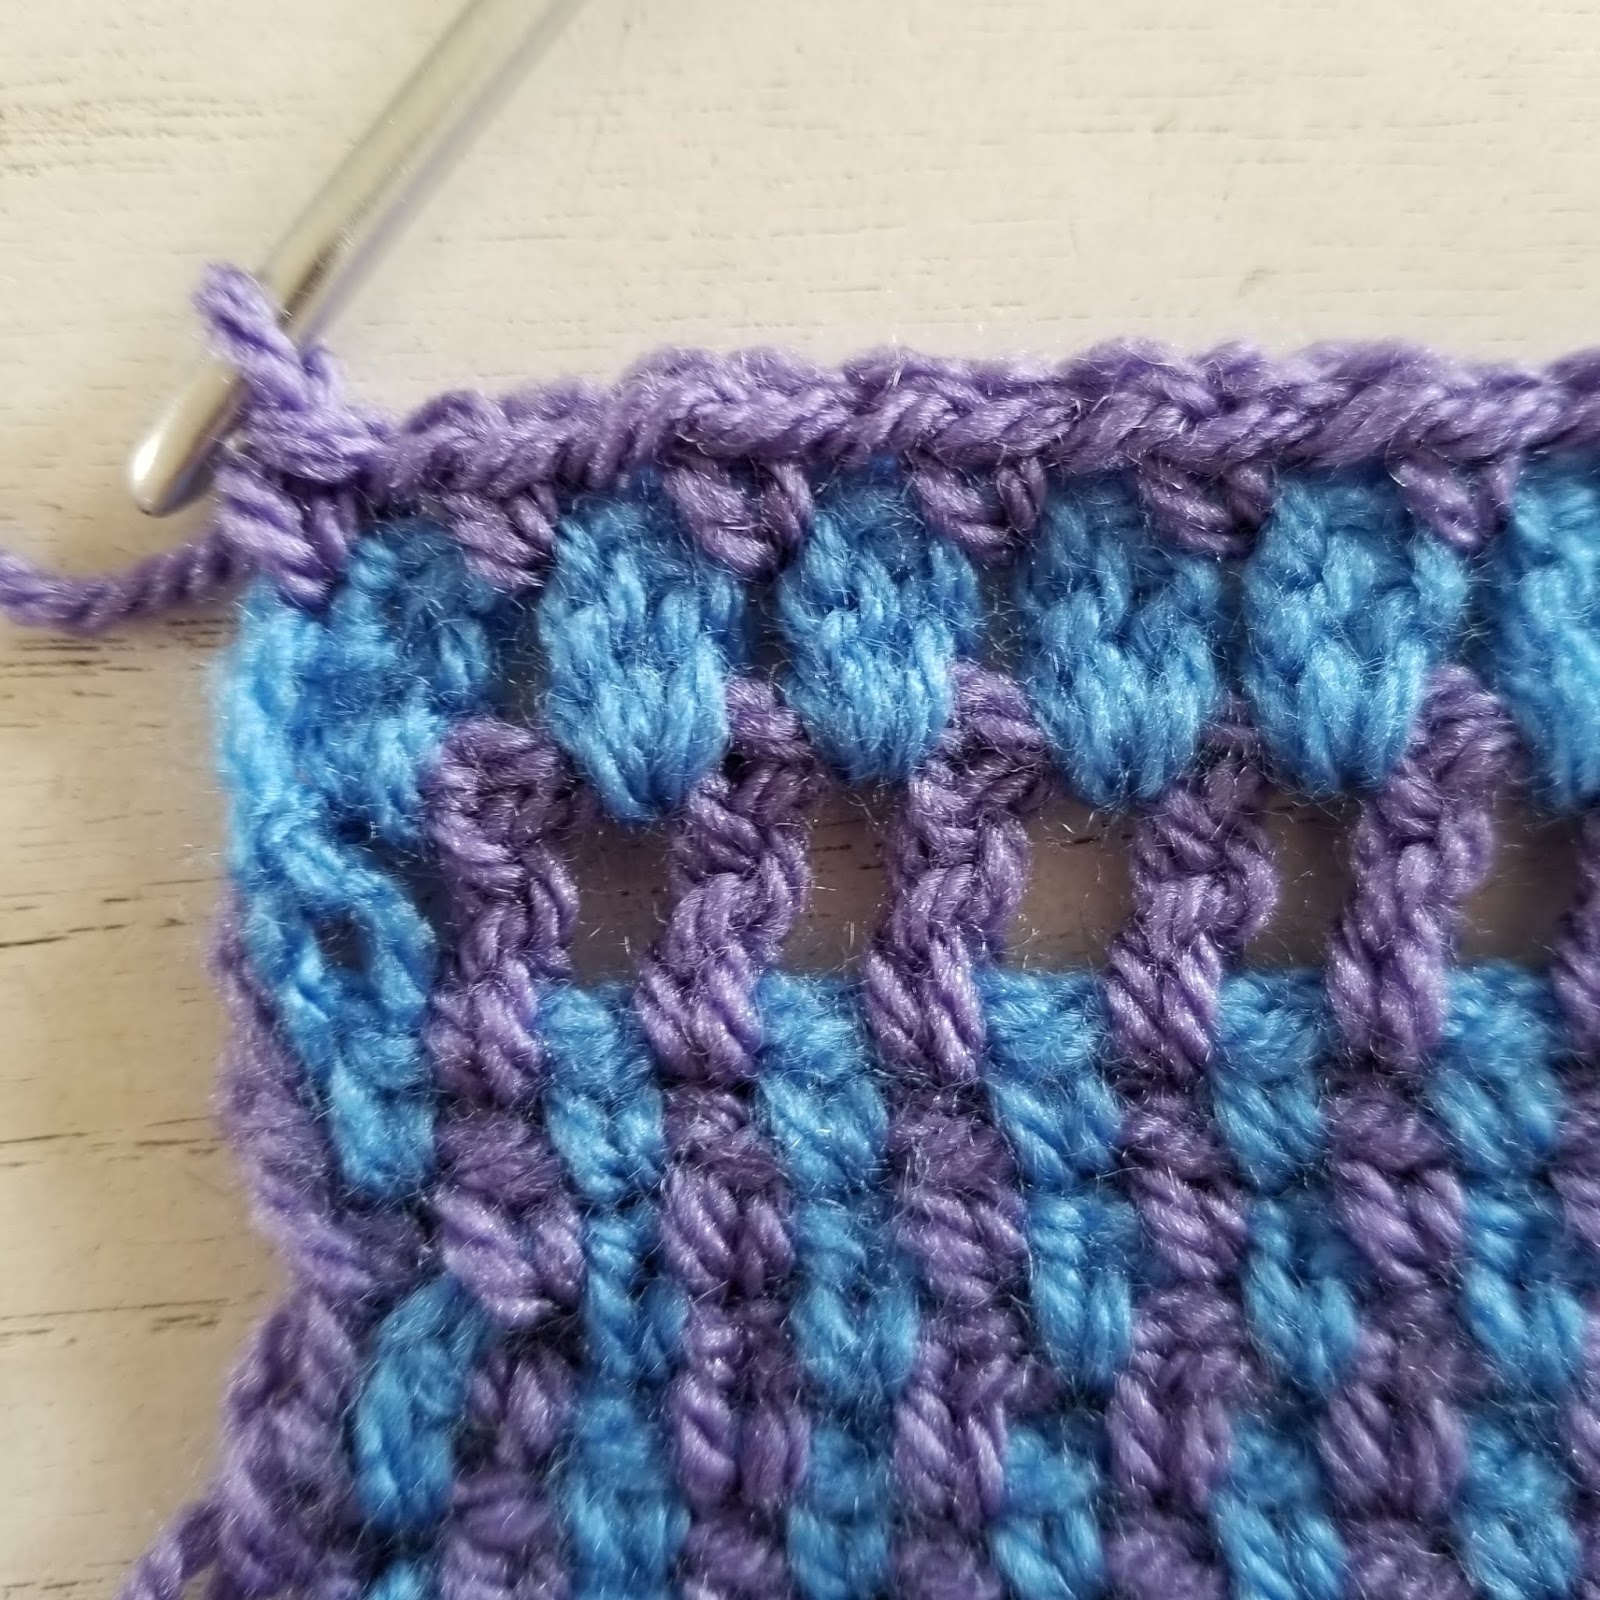
Rep Row 5 once (3 color C rows), omitting final chs, fasten off both colors
Border:
The border is worked in rounds with the RS facing throughout.
Rnd 1 (RS): (Tip: As you work along the foundation row of the intermesh panel, work into both layers to fasten colors A and B together along that edge.) With A, join with sc to corner of foundation row, (sc, ch 1) evenly around, placing (sc, ch 1, sc, ch 1) in each corner, join with sl st to first sc

The photo above shows you how to work into the two layers of mesh of the foundation row on that first round of your border. Now the two layers are fastened neatly together.

When you work along the top edge of your blanket, you can complete your (sc, ch 1, sc, ch 1) in the top of the dc, then ch 1, then (sc, ch 1) between each 2-dc group along the top edge before working another (sc, ch 1, sc, ch 1) in the last dc of the top edge.

Rnd 2: Sl st to next ch-1 sp, ch 4, (dc in next ch-1 sp, ch 1) rep around placing (dc, ch 3, dc, ch 1) in each corner ch-1 sp, join to 3rd ch of ch-4


Rnd 3: Sl st to next ch-1 sp, working in ch-sps around, ch 4, *sk 1 sp, dc in next sp, ch 1, (working behind last dc made, work first half-closed dc in last sp, sk next worked sp, work second half-closed dc in next sp, complete Cl, ch 1) rep across ending last half-closed dc in ch-3 sp, ch 1, 7 dc in corner ch-3 sp, ch 1; rep from * 3 more times, sk 1 sp, sl st to 3rd ch of starting ch-4, working behind ch-4, work first half-closed dc in skipped sp, working in front of first dc, work second half-closed dc in next sp after ch 4, complete Cl, ch 1, join with sl st to first Cl


Notice the Cl "straddles" the skipped ch-1 sp. (This one shown above actually began with a stacked sc (counts as a dc), ch 1--which is your choice, of course, or you can work a ch 4. I like the stacked sc because it actually has a regular st at the top vs trying to work into a ch, but either way works.

Your first half-closed dc will then be worked in that skipped ch-sp--but behind the previous dc.

The second half-closed dc is then worked in the next ch-sp beyond the last Cl.

This continues all the way along each side--working only in the ch-1 sps.

When you get to the corner ch-3 sp, complete your last Cl with its second half-closed dc in the ch-3 corner sp. Ch 1. Then complete 7 dc in the corner ch-3 sp.
Rnd 4: Ch 4, *(dc in next ch-1 sp, ch 1) rep across, dc in first dc of 7-dc corner group, ch 1, sk 1 dc, dc in next dc, ch 1, (dc, ch 3, dc, ch 1) in next dc, dc in next dc, ch 1, sk 1 dc, dc in next dc, ch 1; rep from * 3 more times, (dc in last ch-1 sp, ch 1) twice, join with sl st to third ch of ch 4
 This photo gives you a close-up of the positioning of the sts in the 7-dc corner group.

Rnd 5: Sl st to next ch-1 sp, working in ch-sps around, ch 4, *sk 1 sp, dc in next sp, ch 1, (working behind last dc made, work first half-closed dc in last sp, sk next worked sp, work second half-closed dc in next sp, complete Cl, ch 1) rep across** ending last half-closed dc in ch-3 sp, 7 dc in corner ch-3 sp, ch 1; rep from * 3 more times, and from * to ** once, ending last Cl in next sp beyond beginning ch-4, ch 1, join to first dc
(This round is essentially the same as Rnd 3! Remember, with those asterisks, work all the way through until you are instructed to repeat--do that whole thing 3 times, then work between the double asterisks just once.)
(This round is essentially the same as Rnd 3! Remember, with those asterisks, work all the way through until you are instructed to repeat--do that whole thing 3 times, then work between the double asterisks just once.)
Rnd 6: Ch 1, sc in each st and ch-sp around placing (sc, ch 1, sc) in center st of each 7-dc corner group, join to first sc, fasten off
Weave in ends.
My blanket didn't require any blocking as everything, including the border, laid nice and flat. But you can do what suits your project best.
Don't forget!! You can find a nice and tidy, ad-free PDF of this very pattern in my Felted Button pattern shop here, or my Etsy shop here for a small fee. It also includes the pictures and explanations along with the written pattern, but the pictures are all at the end so it can be printed easily.
If you are just finding this half of the blanket pattern, you can find the first part here. There are links there to color combinations with the Scheepjes Whirl, as well as some links to find the yarn. Here are some of my favorite places to go for yarn:
Wool Warehouse* (UK)
Deramores* (UK)
Knotty House* (CA)
Black Sheep Wools* (UK)
Stitched Naturally (US)
Local Scheepjes stockists
I hope you have enjoyed the pattern and making the blanket! I would love to see what colors you've chosen and how it's all come together so feel free to share in my Felted Button Facebook group here. It's also a great place to get help if you get stuck or have questions. Stay in the "Button" loop on Instagram, Facebook and Pinterest for more fun and colorful patterns, too. Oh, my word! I've got so many colorful and happy WIPs to share with you in the coming weeks.
Be well. Be happy. Practice some self-care and mindfulness--which for me takes place best with a little yarn-play and crochet.
| On the Board | -- Be kind. And be grateful that God is kind. It's a happy way to live. ~~Jeffrey R. Holland
 *This post contains affiliate links which if used by you cost you no more but provide me a small commission that allows me to continue providing free patterns and blogging. Thanks so much for your support!
My blanket didn't require any blocking as everything, including the border, laid nice and flat. But you can do what suits your project best.
Don't forget!! You can find a nice and tidy, ad-free PDF of this very pattern in my Felted Button pattern shop here, or my Etsy shop here for a small fee. It also includes the pictures and explanations along with the written pattern, but the pictures are all at the end so it can be printed easily.
If you are just finding this half of the blanket pattern, you can find the first part here. There are links there to color combinations with the Scheepjes Whirl, as well as some links to find the yarn. Here are some of my favorite places to go for yarn:
Wool Warehouse* (UK)
Deramores* (UK)
Knotty House* (CA)
Black Sheep Wools* (UK)
Stitched Naturally (US)
Local Scheepjes stockists
I hope you have enjoyed the pattern and making the blanket! I would love to see what colors you've chosen and how it's all come together so feel free to share in my Felted Button Facebook group here. It's also a great place to get help if you get stuck or have questions. Stay in the "Button" loop on Instagram, Facebook and Pinterest for more fun and colorful patterns, too. Oh, my word! I've got so many colorful and happy WIPs to share with you in the coming weeks.
Be well. Be happy. Practice some self-care and mindfulness--which for me takes place best with a little yarn-play and crochet.
| On the Board | -- Be kind. And be grateful that God is kind. It's a happy way to live. ~~Jeffrey R. Holland

Related Posts

Book Review, Crochet Cute Critters
When I first picked up my hook as an adult to begin crocheting, I did as I typically do when learning new things...I ...
Read More
Waikiki Wildflower Blanket Pattern Anew
When I contemplate the beginnings of Felted Button, one of my fondest memories is the creation of my Waikiki Wildflow...
Read More
Prism Blanket Make-a-Long MAL
I'm thrilled to be announcing something that's been in the works for quite some time now...
So what's a Scheepjes ...
Read More